
 |
 |
 |
 |
 |
 |
 |
 |
Sunday, January 28, 2018
Monday, January 22, 2018
Repairing a Corrupt MDF File with Stellar Phoenix Database Repair
No matter what you do to prevent issues, there will be times when one of your SQL Server databases will become corrupt. Whether it is a live database or a copy, having a busted MDF file is not fun. The usual process to recovery involves restoring the database from a full backup, restoring incremental backups, and then rolling the logs forward from the last incremental backup. This standard process is warranted but can be time consuming and nerve racking.


 Originally I thought that this process fixed the MDF and that I could now use the original file. This is not the case. The Stellar Phoenix Database Repair application has brought all of the database structures and data into its system; your database is technically repaired in memory. You can review the table structures and data right within the app itself.


This option connects directly to your SQL Server and recreates the damaged database including the data itself. There is an option to create a new database or run the process live on an existing database. In my case I just needed a new database.

It may be a good practice to create a new database to isolate things and not disrupt a live database, however, if the live database is corrupt it probably does not make a difference anyway.

As the save process runs, the Log Report window displays the progress of the database recreation which mainly involves the tables and their data. This process can be time consuming and is dependent on how much data is in the database. I noticed that the amount of columns in the table determined the performance of the recreation.
Overall, I experienced the processing of 1000 rows in anywhere between 2-4 seconds. Tables with less than 10 columns were closer to the 2 seconds per thousand rows and tables with over 10 or 20 columns were processing closer to 4 seconds per thousand rows. Therefore, for average and planning sake, I would comfortably state that 3 seconds per 1000 rows is a good bet.
Nonetheless, I would attempt to calculate an estimated time as it could elapse anywhere from 5 minutes to 50 minutes depending on your data. Users, help desk, management, etc. always like to understand how long things will take to correct and be brought back online.
Once the save process is complete, a message box appears accordingly:


I have found an easier way to repair my databases without worrying about backups and logs. Stellar Data Recovery has produced a SQL Database Repair application that will quickly scan and repair corrupted SQL Server databases.
While it is possible to run the repair process on a live database, my scenario involved an MDF file that I wanted to attach to my database server.

My MDF file was obviously bruised as SQL Server Management Studio did not recognize it as a primary database file; even though it was supposed to be.

Luckily, I had Stellar Phoenix Database Repair installed. The software can run on your local machine or on a server. I recommend installing it on your local machine as the software can connect to your SQL Server instances and doesn't need to be local to the database(s).

Upon launching the repair app, the Select Database dialog automatically appears which saves the step of clicking on the Select Database top ribbon button:

All you need to do is select the database file using the Select Database button and then click the larger Repair button. The software will process and repair the database. It did not seem to take too long in my case. Once complete, you will receive a success message as follows:

 Originally I thought that this process fixed the MDF and that I could now use the original file. This is not the case. The Stellar Phoenix Database Repair application has brought all of the database structures and data into its system; your database is technically repaired in memory. You can review the table structures and data right within the app itself.
Therefore you need to save to healed version in some fashion.

While the software provides several options, I chose the MSSQL default option:

This option connects directly to your SQL Server and recreates the damaged database including the data itself. There is an option to create a new database or run the process live on an existing database. In my case I just needed a new database.

It may be a good practice to create a new database to isolate things and not disrupt a live database, however, if the live database is corrupt it probably does not make a difference anyway.

As the save process runs, the Log Report window displays the progress of the database recreation which mainly involves the tables and their data. This process can be time consuming and is dependent on how much data is in the database. I noticed that the amount of columns in the table determined the performance of the recreation.
Overall, I experienced the processing of 1000 rows in anywhere between 2-4 seconds. Tables with less than 10 columns were closer to the 2 seconds per thousand rows and tables with over 10 or 20 columns were processing closer to 4 seconds per thousand rows. Therefore, for average and planning sake, I would comfortably state that 3 seconds per 1000 rows is a good bet.
Nonetheless, I would attempt to calculate an estimated time as it could elapse anywhere from 5 minutes to 50 minutes depending on your data. Users, help desk, management, etc. always like to understand how long things will take to correct and be brought back online.
Once the save process is complete, a message box appears accordingly:

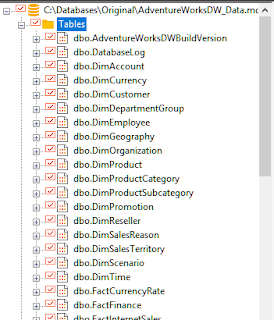
Navigating to the database server in SQL Management Studio yields a recovered database:

Overall I felt very confident in the repair of my MDF file using Stellar Phoenix Database Repair. I did not experience a live database corruption although it would be a similar scenario as the recommendation is to take the database offline and copy the MDF file to a different file system location.
Using a third-party tool such as Stellar Phoenix Database Repair streamlines a SQL Server disaster recovery scenario and takes the headaches of restoring backups and logs out of the mix. While there is always a chance of lost data or incomplete records, you need to do what's right and attempt for a 100% recovery; using Stellar Phoenix Database Repair will give you an edge!
Here are my overall impressions (and witty words) of the software:
- Easy to use
- Click and fix
- Save/Recover like a charm
- No-brainer compared to backup/restore processes
- Easy peasy
- Could save your day
A free download of this amazing repair software is available here.
I have two videos that compliment this post as follows:
I have two videos that compliment this post as follows:
Friday, January 19, 2018
SQL Server: Error Attaching a Database - At Least One File Is Needed - RESOLVED
If you receive an error as shown below:

Watch this video to resolve. Essentially the file name must match the database name.

Watch this video to resolve. Essentially the file name must match the database name.
Thursday, January 18, 2018
Wednesday, January 17, 2018
Tuesday, January 16, 2018
Monday, January 15, 2018
Friday, January 12, 2018
CORTANA Bad Jokes - English UK
I switched my Cortana language to English (United Kingdom) and not only did I get a set of different bad jokes, she also included many of the English (US) bad jokes. I was able to pull out 88 bad jokes.
Wednesday, January 10, 2018
Blowing Cortana's Mind: One Cause of Unresponsiveness
I have been playing with and experimenting with Cortana on Windows 10 recently. I have noticed that after too much use, Cortana becomes unresponsive. I noticed that, in my case, the cause was a spawn of Windows Error Reporting processes that are disk intensive. To see if this is the cause, review this video.
To disable Windows Error Reporting, see this post.
To disable Windows Error Reporting, see this post.
Disabling Windows Error Reporting in Windows 10
The Windows Error Reporting service can cause havoc to your computer, depending on what you are doing, as it will spawn processes that peg your disk I/O. I have done this several times by playing with Cortana (see this post for insight). I decided to simply disable the service such that I could avoid issues in the future This video shows how to disable the Windows Error Reporting Service.
Tuesday, January 9, 2018
Monday, January 8, 2018
Sunday, January 7, 2018
Recording a PowerPoint Show or Video without Audio
Objective
You would like to create a presentation in PowerPoint that automatically plays and navigates through your slides, however, you do not wish to record any audio/voice.
Overall Solution
The overall solution is, ironically, not to record a slide show at all but yet simply save your presentation as a PowerPoint Show or Video (e.g. MPEG-4 Video). Therefore you will not need to use the Record Slide Show option as you would normally do to record a presentation with audio.
 |
| Use the Record Slide Slow when you actually want audio |
If you save your presentation as a video, you will have an automated presentation that advances through the slides, however, the default display duration is 5 seconds per slide which may not correspond with your content.
Therefore, you need to modify your presentation to advance slides automatically according to your needs or liking.


Solution for a PowerPoint Show
The key modification to automate a PowerPoint Show without having the user click through the slides is to change the advance slide setting from On Mouse Click to an After time duration. This may be accomplished from the Transitions tab.
With a slide selected, click on the Transitions tab. On the far right, uncheck the On Mouse Click checkbox:

Next, click the After check box to select that option and enter a time duration (in seconds):

For PowerPoint Shows, the selected slide will now advance after the duration that you have entered without having the user click. To save time and establish a foundation, click on the Apply To All button such that each slide will no longer advance on a mouse click and use the duration setting you entered.

Now all you need to do is go to each slide and tweak the After duration accordingly. When you save the presentation as a PowerPoint Show, the presentation will automatically advance through the slides based on your timings.
Solution for a PowerPoint Video
When you save your presentation as a MPEG-4 Video, the On Mouse Click option (as shown in the previous section) is ignored. The default duration of each slide advance is after 5 seconds.
To tweak and modify your presentation video, follow the same steps for the PowerPoint Shows and modify the After duration accordingly. When you save the presentation as a MPEG-4 Video, the presentation will automatically advance through the slides based on your timings.
Conclusion
- To record a presentation without audio do not record a slide show at all
- Uncheck the On Mouse Click option under the Advance section of the Transitions tab
- Modify the advance timings of your slides from the Transitions tab
- Save your presentation as a PowerPoint Show or MPEG-4 Video
Friday, January 5, 2018
Subscribe to:
Posts (Atom)