Showing posts with label Office 365. Show all posts

Friday, January 9, 2015

SharePoint Online: Search Image Preview Confirmation

There have been some comments on my original postings in regards to image search results and previews of images not stored in picture libraries. The original post is here.

The issue now is does this work in SharePoint Online? There is no way to add file types to search in SharePoint Online. I was thinking that maybe, behind the scenes, they had this corrected and all would be good. Nope!

Picture libraries seem to have full support for all image types (at least the usual suspects - gif, jpg, png).

Example Preview of Image in Picture Library


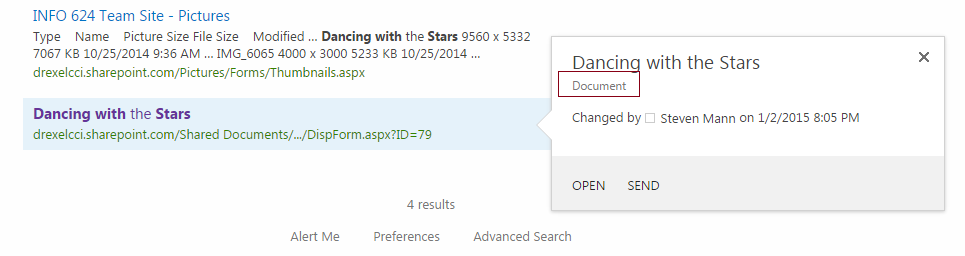
Example Preview of Image in Document Library


So this just confirms that images that are not stored in picture libraries do not get rendered as images in search results. Right now the only workaround I would think is to modify the document item search template and look for the file extension - similar to what I originally did for Problem #2 in this post. (my original solution was not actually needed because of an early bug where image result types were set to show default items).

Monday, August 1, 2011

Office 365: Installing and Updating Lync Online

Installing Lync is part of the user boarding process which I explain in my guide. Each user receives a temporary password for Office 365 so it is important for them to login and change their password.
Once the user has updated their password and are logged into Office 365, it is time to setup the computer for Office 365 use. In the Start here list, click the Set up now link on line #1.


The Downloads page appears. The first step is to download and install Microsoft Lync 2010.


Select the Language and the Version for the computer and click on Install. You are prompted to Run or Save the Lync setup package. Click Run. Once downloaded, the Micrsoft Lync 2010 Setup is launched.


Click Install. Since Internet Explorer is running you are prompted to close the application.Click OK.


Microsoft Lync 2010 begins installation. 


Once the install is complete, the setup displays Install succeeded. Make sure Start Lync is checked and click Close.


The communicator icon appears in your task bar but you may need additional software updates before continuing.


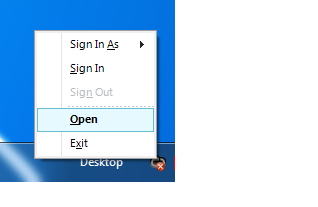
After installing Microsoft Lync 2010, your computer may need software updates for Lync 2010 to run. Right-click the communicator icon on your task bar and select Open.


The Microsoft Lync window opens. Click on the Download and install now? link to install the additional software that is required. 


When prompted to Run or Save, click Run.

The software is downloaded and the Microsoft Online Services Sign-in Assistant Setup launches.


Check the acceptance check box to agree the License Agreement and click Install. The software is installed.


On the completion dialog click Finish. Go back to the Lync sign in and click Sign in.

You are signed into Lync 2010 and the main Lync dashboard appears.


A Microsoft Lync 2010 tutorial is also launched.


Click the start here link in the lower left-hand corner.

Each user should run through the tutorial and setup. There are navigation links in the lower left-hand corner of the screens to start and move to the next step.


Once completed, click the exit link in the lower left-hand corner. Lync 2010 is now installed, setup, and configured for use.


Catch more Office 365 steps in Steve's Office 365 Walkthough Guide.

Follow Steve on Twitter @stevethemanmann


Adding a Custom Domain to Office 365

If you have not registered for a custom domain, you may use the many providers on the internet such as the Domain Registry of America (www.droa.com). You will first need to determine if the domain name is available and then go through the purchasing procedures accordingly. Since I already have stevethemanmann.com and use that for my blog site, for my walkkthrough guide I created a new domain of “stevethemanmann.net”. After making the purchase, it could take several hours before your domain name is ready and available for configuration.

When you know your domain name is ready, return to your Office 365 home page and click on the Admin menu item at the top of the page.


The Admin screen appears. Under Get your team started, click on the Add and verify your domain.


The Add a Domain screen appears. Enter your custom domain in the text box and click Check domain.


Your domain will be verified and a Domain Verification appears on the screen.


Click Next. The Verify Domain screen appears. Although the TXT record method is preferred, in my case I needed to use the MX record method. Read the directions carefully on this screen.


 You need to modify the host settings within your domain configuration from your provider.


Once you modify the settings, return to the Verify Domain screen and click Verify. You may need to wait a few minutes before your domain can be verified. 

Once verified, the Edit Name Server screen appears. Read the directions carefully. Again you will need to configure your domain and modify the Nameservers settings.


The Nameserver names are listed on the Office 365 screen (in Step #3). Enter these values into your domain configuration and accept the changes.

Back on the Office 365 screen, click Next. The Domain is added and a confirmation screen appears.


Click Finish. The Domains screen appears and now your custom domain is listed.


Catch more Office 365 steps in Steve's Office 365 Walkthough Guide.

Follow Steve on Twitter @stevethemanmann


Matched Content