


If you have not registered for a custom domain, you may use the many providers on the internet such as the Domain Registry of America (www.droa.com). You will first need to determine if the domain name is available and then go through the purchasing procedures accordingly. Since I already have stevethemanmann.com and use that for my blog site, for my walkkthrough guide I created a new domain of “stevethemanmann.net”. After making the purchase, it could take several hours before your domain name is ready and available for configuration.
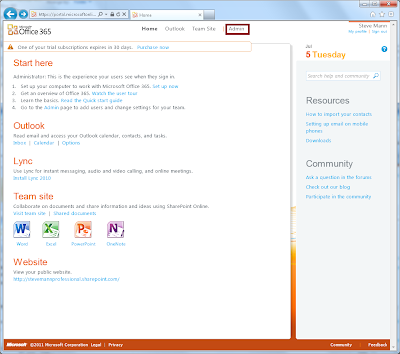
When you know your domain name is ready, return to your Office 365 home page and click on the Admin menu item at the top of the page.
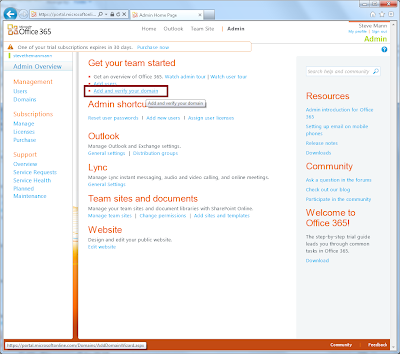
The Admin screen appears. Under Get your team started, click on the Add and verify your domain.
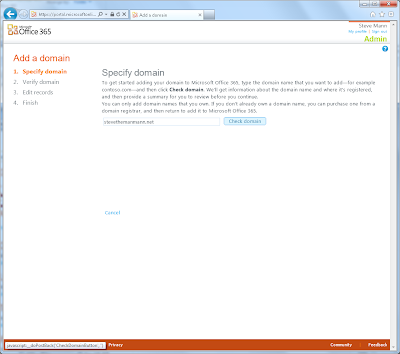
The Add a Domain screen appears. Enter your custom domain in the text box and click Check domain.
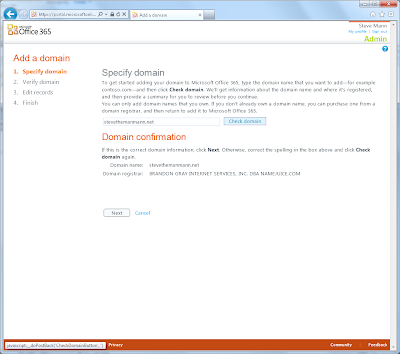
Your domain will be verified and a Domain Verification appears on the screen.
Click Next. The Verify Domain screen appears. Although the TXT record method is preferred, in my case I needed to use the MX record method. Read the directions carefully on this screen.
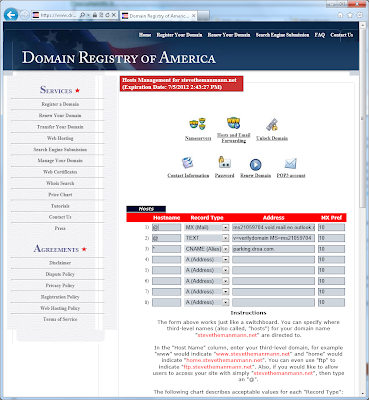
You need to modify the host settings within your domain configuration from your provider.
Once you modify the settings, return to the Verify Domain screen and click Verify. You may need to wait a few minutes before your domain can be verified.
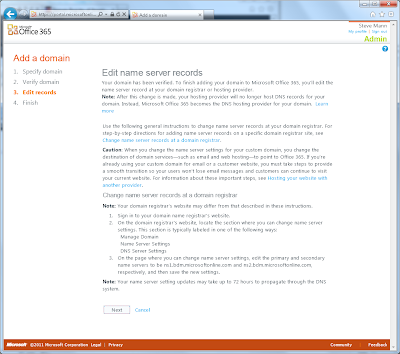
Once verified, the Edit Name Server screen appears. Read the directions carefully. Again you will need to configure your domain and modify the Nameservers settings.
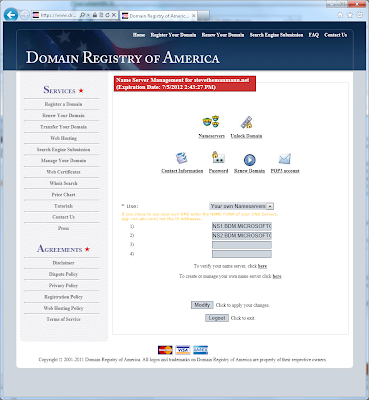
The Nameserver names are listed on the Office 365 screen (in Step #3). Enter these values into your domain configuration and accept the changes.
Back on the Office 365 screen, click Next. The Domain is added and a confirmation screen appears.
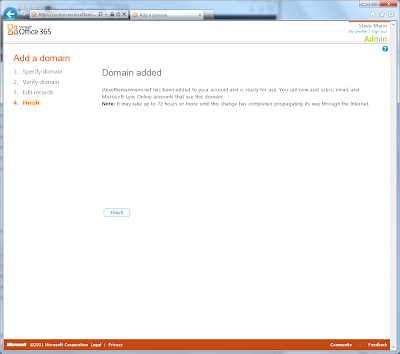
Click Finish. The Domains screen appears and now your custom domain is listed.

Catch more Office 365 steps in Steve's Office 365 Walkthough Guide.
Follow Steve on Twitter @stevethemanmann
When you know your domain name is ready, return to your Office 365 home page and click on the Admin menu item at the top of the page.

The Admin screen appears. Under Get your team started, click on the Add and verify your domain.

The Add a Domain screen appears. Enter your custom domain in the text box and click Check domain.

Your domain will be verified and a Domain Verification appears on the screen.

Click Next. The Verify Domain screen appears. Although the TXT record method is preferred, in my case I needed to use the MX record method. Read the directions carefully on this screen.

You need to modify the host settings within your domain configuration from your provider.

Once you modify the settings, return to the Verify Domain screen and click Verify. You may need to wait a few minutes before your domain can be verified.
Once verified, the Edit Name Server screen appears. Read the directions carefully. Again you will need to configure your domain and modify the Nameservers settings.

The Nameserver names are listed on the Office 365 screen (in Step #3). Enter these values into your domain configuration and accept the changes.
Back on the Office 365 screen, click Next. The Domain is added and a confirmation screen appears.

Click Finish. The Domains screen appears and now your custom domain is listed.

Catch more Office 365 steps in Steve's Office 365 Walkthough Guide.
Follow Steve on Twitter @stevethemanmann
No comments:
Post a Comment